
Maintaining hardwired smoke alarms requires monthly testing, annual battery replacement, and professional installation to ensure continuous protection during power outages and emergencies. While powered by your home’s electrical system, these devices rely on backup batteries and sensitive sensors that degrade over 10 years, necessitating a complete unit replacement after a decade.
(1) Essential Maintenance Tasks
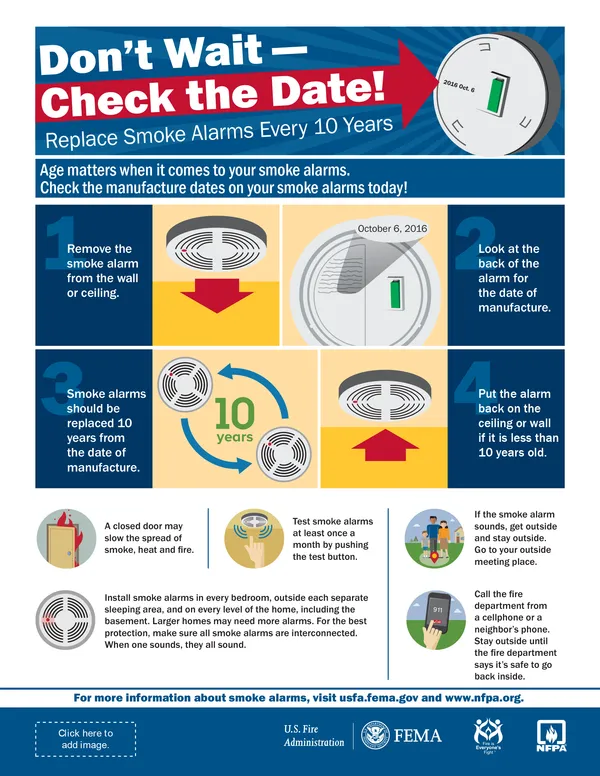
- Monthly Testing: Press and hold the test button on each alarm once a month until it beeps loudly to confirm it is receiving power and the sensor is functional.
- Annual Battery Replacement: Even hardwired units typically have a backup battery (often 9V or AA) that should be replaced once a year, or immediately if the unit begins to “chirp”.
- Vacuuming and Cleaning: Every six months to a year, use a vacuum with a soft brush attachment or compressed air to remove dust, cobwebs, and debris from the side vents.
- Wipe Down Casing: Clean the exterior with a slightly damp microfiber cloth, but never use liquid cleaning agents or submerge any part of the alarm in water.
(2) Critical Safety Tips
- Replace Every 10 Years: Smoke alarm sensors lose sensitivity over time; replace the entire unit every 10 years from the manufacture date found on the back.
- Never Paint or Decorate: Avoid painting or adding stickers to the device, as this can block the vents and prevent smoke from reaching the internal sensor.
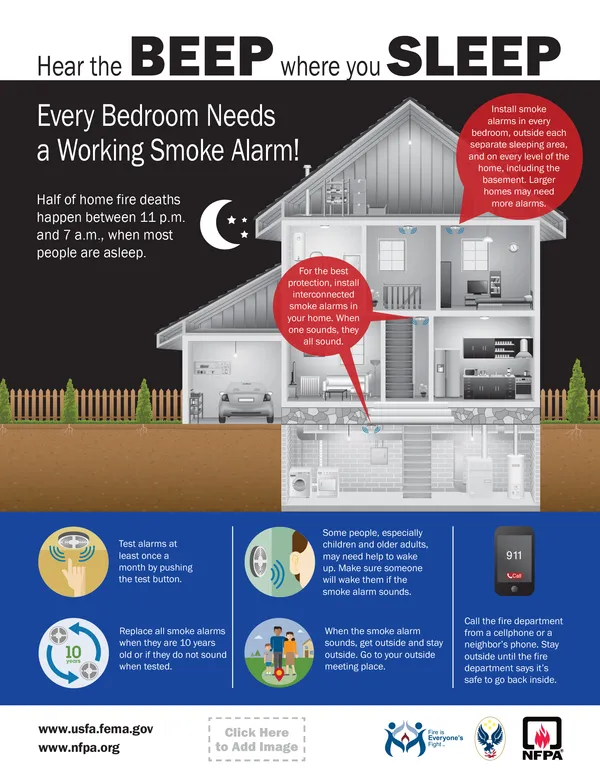
- Interconnect Your Alarms: Ensure all alarms are interconnected (hardwired or wireless) so that when one sounds, they all sound throughout the home.
- Correct Placement: Install alarms on every level, inside every bedroom, and outside each sleeping area. Keep them at least 10 feet away from cooking appliances to minimize nuisance alarms.
- Use the “Hush” Button: Do not remove batteries to silence nuisance alarms from cooking. Use the hush feature or temporarily fan the unit with a towel.
(3) Common Issues, Troubleshooting & Professional Care
- Investigate Chirping: A sporadic chirp usually indicates a low battery, but persistent beeping after battery replacement may signal a power interruption (tripped breaker) or a sensor malfunction.
- Electrical Safety: Only qualified electricians should perform the initial installation or major wiring repairs for hardwired systems.
- Handle Nuisance Alarms Correctly: If cooking fumes set off your alarm, use the “hush” button instead of removing the battery.
- Chirping After Battery Change: This often occurs due to “residual charge” in the unit. To fix this, turn off the breaker, remove the alarm, take out the battery, and hold the test button for 15–30 seconds to fully drain the power before reassembling.
- Interconnected System Triggers: If one hardwired unit is faulty or dirty, it can cause all linked alarms in the house to sound. Identify the “initiating” unit—it often has a different flashing LED pattern—to troubleshoot that specific device.
- Frequent False Alarms:
- Environmental Factors: Steam from bathrooms or high humidity (above 85%) can trigger sensors.
- Placement: Keep units at least 10 feet away from cooking appliances and away from drafty areas like ceiling fans or air vents that can blow dust into the sensor.
- Power Surges: Intermittent beeping can be caused by electrical interference or power grid switching.
Views: 0